Let's Share
My personal place to share knowledge about Sitecore, Powershell, Amazon Web Services and .NET
My personal place to share knowledge about Sitecore, Powershell, Amazon Web Services and .NET
posted by Robert Senktas | 21-02-2017
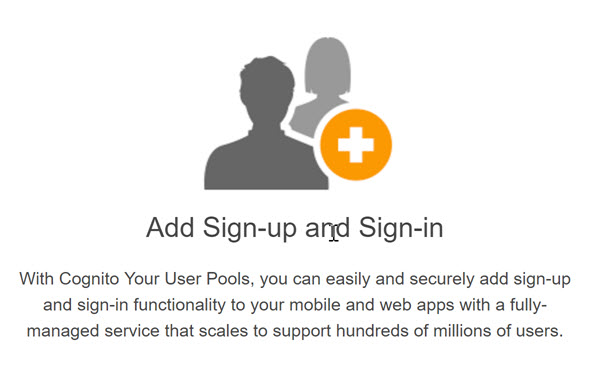
If you are planing Sign-up and Sign-in functionality in your .NET appliation then you should consider using Amazon Cognito User Pools.
User pools scale to hundreds of millions of users and provide simple, secure, and low-cost options for you as a developer. You can also implement enhanced security features, such as email and phone number verification, and multi-factor authentication. In addition, Amazon Cognito User Pools lets you customize workflows through AWS Lambda, for example by adding app-specific logic to user registration for fraud detection and user validation.
In this post I will show you how to start using Amazon Cognito User Pools.
AWS Account – can be created here: https://portal.aws.amazon.com/gp/aws/developer/registration/index.html
Cognito Identity service is free up to 50 000 MAUs per month, details are available here: https://aws.amazon.com/cognito/pricing/
The main costs during implemetation is sending SMS messages, details you can find here: https://aws.amazon.com/sns/sms-pricing/
From my perespective Amazon Cognito has the following adventages:
If you implement once the login functionality in your application then you probably know how much time it takes. With Amazon Cognito you can focuse on your business core functionalites not user account management.
To configure user pool you need to perform a few simple steps:

In this step you have to choose profile attributes those will be required during user registration. Note: This is important step, becasue if you would like to change attributes you have to recreate user pool.
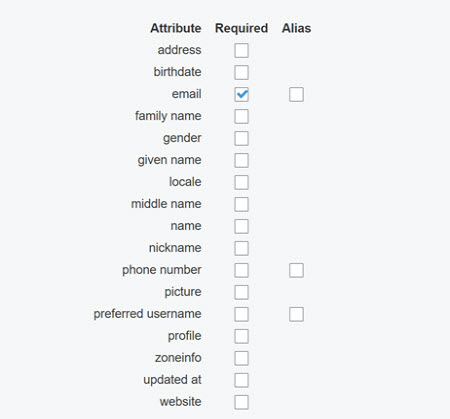
If predefined attributes are not enought you can add up to 25 custom attributes.

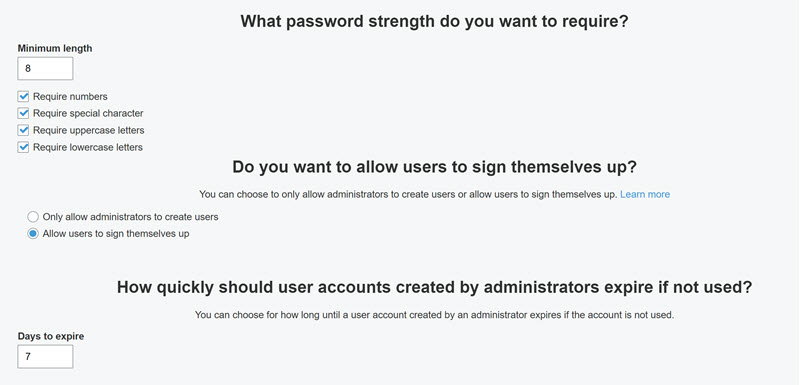
In this step you are able to configure password policy like minimal length and type of characters required in password. The next option to choose is decide if users can register themselves by your application or administrator will have to create users. In my case I would like to use Cognito for web application that's why I give users posibility to register themelves by my web application.
In this step you can configure:
 When the user is registered then we would like to verify if registered user is the owner of phone number and/or email address.
If you choose phone number and email verification then phone number verification has priority and will be done in automated way.
It means that if user will be registered then verification code will be send automatically to the mobile phone.
In that case you have to trigger email notification from your application. I will show you how to do this in next part of this post.
When the user is registered then we would like to verify if registered user is the owner of phone number and/or email address.
If you choose phone number and email verification then phone number verification has priority and will be done in automated way.
It means that if user will be registered then verification code will be send automatically to the mobile phone.
In that case you have to trigger email notification from your application. I will show you how to do this in next part of this post.
If you would like use a phone verification or multi-factor authentication then Cogito need access to the Simple Notification Service (SNS).
You can allow this access by creating role - this is a simple step, just create a role and that's it.

The last feature that can be configured in 'Verification' section is enable Multi-Factor Authentication.
This feature can be configured as reguired for all users or as optional feature available only for a interested users.

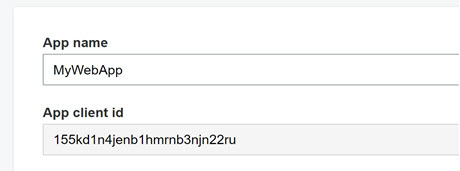
This is a most important step from my point of view. I would like to give access to User Pool for my application. 1. Uncheck option 'Generate client secret' - if this option will be checked then for each request you have to calculate hash. There is no good documentation how to calculate hash. 2. Check option 'Enable sign-in API for server-based authentication' - if this option is unchecked then you have to use SRP to exchange password.
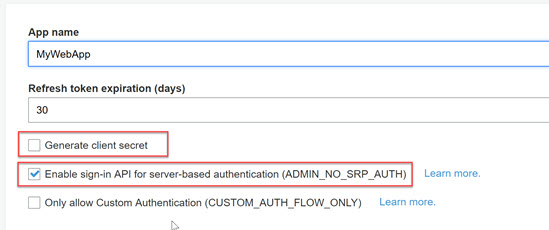
After save application magic number is generated - 'App client id'. This number is required to connect application with user pool.
Now Cognito User Pool is configured. 'Pool Id' and 'App client id' are necessary to connect application to User Pool. In next post I will show simple .NET application that will be used to show the whole user registration process. I also would like to show how handle password recovery process. See you soon.