posted by Robert Senktas | 11-09-2017
Some time ago I started an adventure with Sitecore Azure Toolkit.
Here is a list of my posts about Siteore on Azure:
1.
How to setup automatic login to Azure account
2.
Sitecore on Azure - X0 instance costs
3.
How to use shared access signatures (SAS) in an automated way
4.
How to test Azure region compatibility with Sitecore deployment?
 Before we start our adventure with Sitecore Azure deployment with ARM templates, we have to perform several steps to prepare Azure account. You can found several articles how to manually setup Azure account for Sitecore deployment. At the beginning of my journey to Azure Sitecore deployment, I also prepare the entire environment manually. But now is a time to automate the whole process with Powershell and make others life easier.
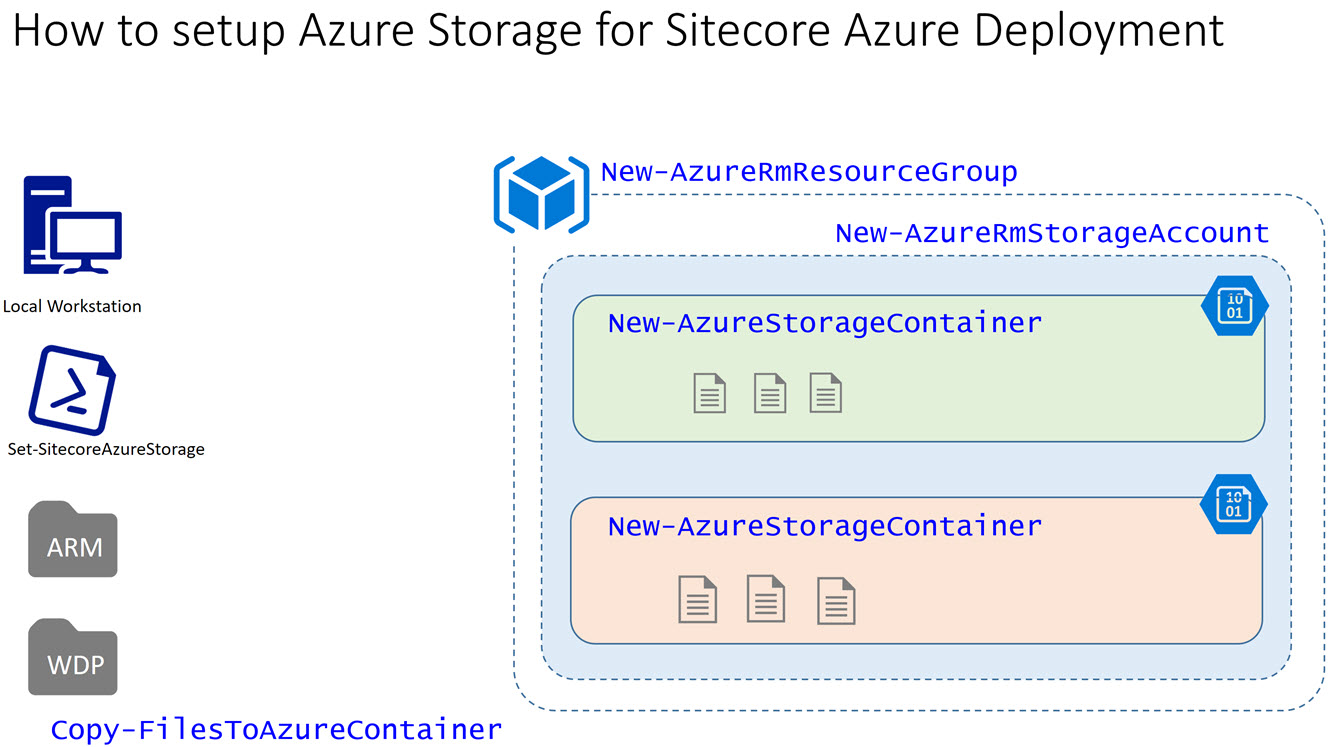
Several steps have to be done to make Azure account to be ready for using ARM templates.
 First of all, we have to gather all necessary ARM templates and WDP packages on the local workstation.
ARM templates are available on GitHub.
WDP packages can be found on Sitecore download site.
On the picture there is a snapshot of my local structure.
I suppose that you already have an Azure subscription account.
The first step is to create an Azure Resource Group. A resource group is a container that holds related resources for an Azure solution.
New-AzureRmResourceGroup -Name $resourceGroupName -Location $storageLocation
The next step is to create an Azure Storage Account. There are several options that we have to consider. Each option can influence price – please read carefully what each option means and how the impact on price. I choose Standard performance tier with locally redundant storage. As access tier I choose Cool.
$storageAccount = New-AzureRmStorageAccount -ResourceGroupName $storageAccountName `
                            -Name $storageAccountName `
                            -Location $storageLocation `
                            -Kind BlobStorage `
                            -AccessTier Cool `
                            -SkuName Standard_LRS
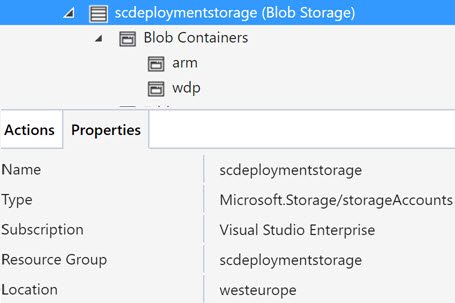
When storage account is ready, I have created two containers one for ARM templates and the second one for WDP packages. See the storage account structure in the picture.
New-AzureStorageContainer -Name $StorageContainerWDP -Permission Off -Context $storageAccount.Context

New-AzureStorageContainer -Name $StorageContainerARM -Permission Off -Context $storageAccount.Context

Finally, we have to copy all files from a local workstation to Azure storage. Function Copy-FilesToAzureContainer is part of Sitecore Automation Module available on Powershell Gallery. And that’s it Azure storage account is ready.
#Copy Sitecore Azure ARM templated from local computer to Azure storage
$files = Get-ChildItem $localArmFiles -Directory | Get-ChildItem -Recurse -Filter "*.json"
Copy-FilesToAzureContainer -Files $files `
    -ContainerName $StorageContainerARM `
    -AzureStorageContext $storageAccount.Context `
    -PathToRemove $localArmFiles `
    -Verbose

#Copy Sitecore Azure WDP packages from local computer to Azure storage
$files = Get-ChildItem $localPackages -Recurse -Filter "*.zip"
Copy-FilesToAzureContainer -Files $files `
    -ContainerName $StorageContainerWDP `
    -AzureStorageContext $storageAccount.Context `
    -PathToRemove $localPackages `
    -Verbose
The full Powershell function snippet:
References:
https://docs.microsoft.com/en-us/azure/azure-resource-manager/resource-group-portal
https://docs.microsoft.com/en-us/azure/storage/common/storage-create-storage-account
Previous posts:
How to use shared access signatures (SAS) in an automated way
How to test Azure region compatibility with Sitecore deployment?